I’ve been playing some old games with OpenEmu recently, and got hooked on the idea of automating DDR game input by reading content from the screen with Max and sending virtual keystrokes back to OpenEmu. Here’s a quick example of what I ended up with:
The backstory…
It all started when I found some PlayStation ‘dance mat’ controllers (like these) that were made for the Dance Dance Revolution PSX game. I have an original PSX and a copy of the game that are boxed up somewhere, so I tracked down an ISO of the game (and connected the mats to the computer with a PSX to USB converter) to try them out with an emulator instead. The mats had been folded up for years and no longer worked very well, but the futile exercise got me thinking about how you might create a virtual DDR-bot with Max that could ‘read’ the arrow information from the screen to trigger button presses automatically.
The idea took several approaches before the system was confident enough to know how to play. But, as it turns out, we can get surprisingly far with some primitive computer vision strategies.
Here’s how I built it…
OpenEmu
Setup
The first thing that is worth doing is making OpenEmu’s emulation larger. The size of the game window (at 1.0x) in OpenEmu is 300×240 (which is a little small on my 2560×1440 display), so I elected to upscale the window in OpenEmu a little bit (2.0x) to make it a little more ‘readable’ on my screen.* As we’re going to use Max to observe the game though, this means that we’re actually asking it to watch 4.0x as many pixels (given that it is doubled in width and height… but my 2013 machine seems to cope OK).
* As well as adjusting the scale of the window, OpenEmu lets you apply filters the emulation, so I’ve kept this as Pixellate to preserve hard edges by duplicating pixels without smoothing. (Nearest Neighbour would also be fine). We’ll re-downscale this in Max with interpolation off (jit.matrix 4 char 300 240 @interp 0) to reduce our pixel crunching.
While the game window is now upscaled to 600×480, the actual location of the game window on my screen starts at (2, 45) given the border of the windows and menu bar in macOS Catalina. We’ll therefore ask Max to watch the desktop with: jit.desktop 4 char 600 480 @rect 2 45 602 525
Getting the Game Screen Into Max
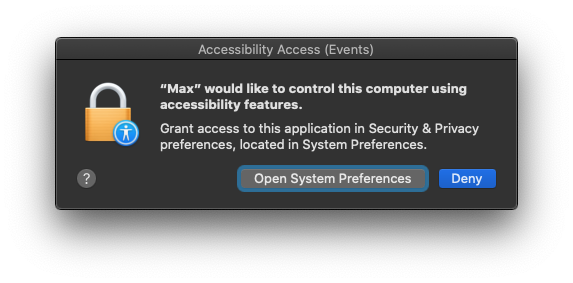
Getting the game screen into Max was fairly easy, but the first time you use jit.desktop you need to explicitly give it permission to capture the screen.
One of the first things I noticed after doing this is that there are a number of visual cues around the screen which might be helpful to time the simulated keystrokes. One of these was the way that the target arrows pulsed in time with the music.
At this point, I started working in parallel on being able to trigger OpenEmu from Max.
Triggering Key Presses in OpenEmu
A Major Catch
This part of the process ended up being a little more involved, due to the way that OpenEmu captures keyboard events. The initial plan was to ask Max to trigger keyboard input using something like 11olsen’s 11strokes object. Unfortunately, OpenEmu captures keyboard input events a lot lower than Max can send them, so it won’t respond to AppleEvents or simulated keyboard input.
OSCulator-in-the-Middle
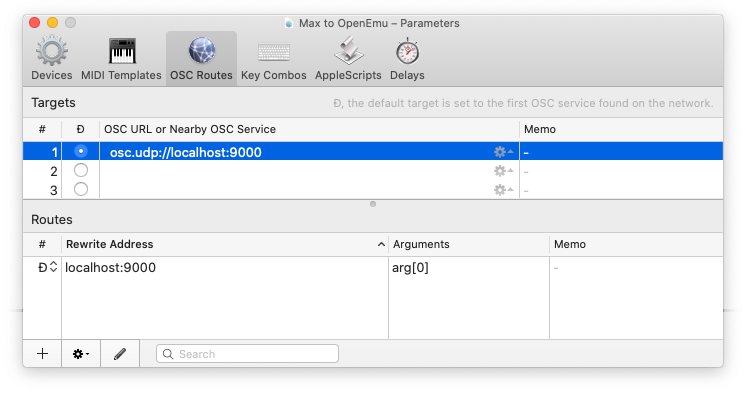
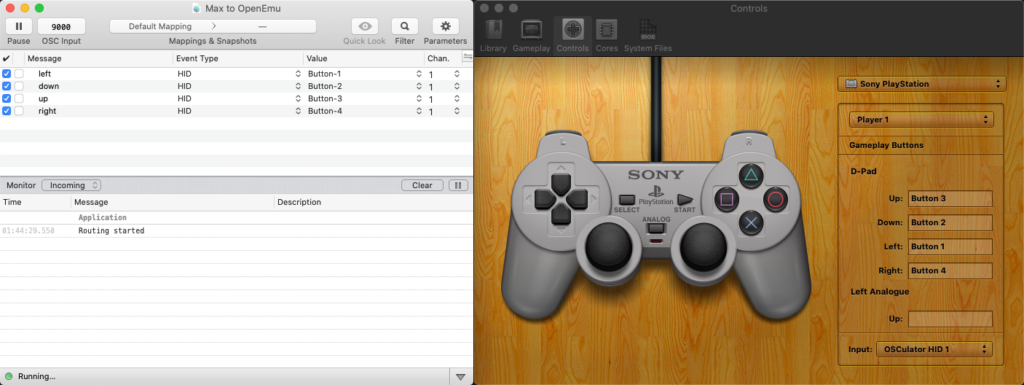
The solution was to creating a virtual joystick with OSCulator, and have Max pipe OSC encoded instructions to it that could be converted to HID events.(See https://github.com/OpenEmu/OpenEmu/issues/1169). To create the virtual joystick, you need to install a system extension.
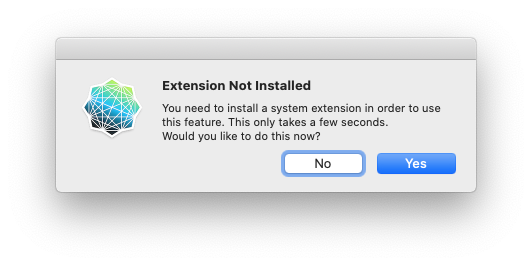
After installing OSCulator’s Virtual Joystick system extension and setting up the OSC routes, I was able to map OSC messages to HID button events.
Crisis averted. Back to the fun stuff.
Identifying Arrows
A key part of having Max play DDR autonomously is that it needs to be able to understand when an arrow passes the target area. Like the pulsing monochrome arrows in the target zone, the rising arrows also have a few characteristics: the centre pulses white, and the arrow shape’s hue rotates through a variety of colours.
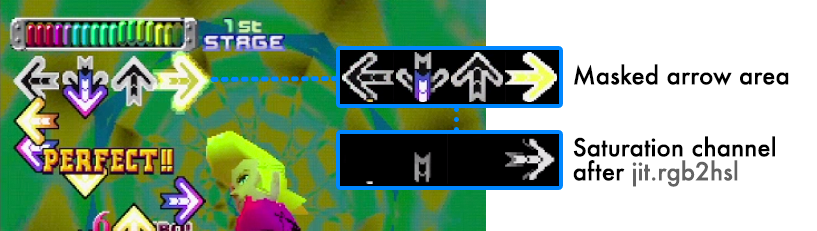
It took a bit of thinking (and a bit of experimenting) about how best to identify arrows as they pass by the target zone. I came up with a series of masks which I thought might help me draw out useful information (and ignore the background area around them).


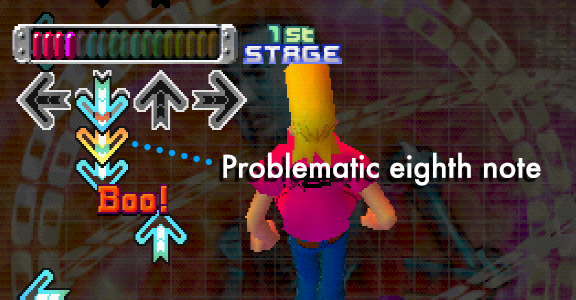
One initial thought was to watch the internal section of the rising arrow and wait until it goes white (using the ‘Centre Zones’ mask below to concentrate on this part of the arrow). This produced some positive results until I noticed in some of the more fast-paced songs that it only pulsed white on quarter-notes… which meant that fast songs with eighth-notes were overlooked. I decided that it might be best to use some of the other masks to try to identify a shift in from monochromatic to colour in the target zone.
The way I ended up identifying arrows with moderate success was by masking the arrow target areas, and watching for increases in chrominance. Tracking the white parts of the arrows meant that I couldn’t identify notes on off-beats, so switching the approach to identify increases in chrominance as the arrows passed the target should help overcome this obstacle.
The arrows in the target frame are pulsing, but they remain grey (which means that the R, G, B channels are roughly equal). When an arrow event passes through the target area though, it brings colour in to the frame. The amount of colour can be identified by converting the RGB matrix into an HSL matrix (jit.rgb2hsl), then piping the third outlet (saturation) into a jit.3m and watching the ‘mean’ levels of the single channel matrix.
Watching Changes in Chroma
In the bottom right corner of the video, I’ve created a collection of multislider objects to illustrate a running history of how Max understands the arrows as they pass the target area. Note that we have spikes that indicate the highest point of saturation in colour that indicates when the arrows are most aligned with the arrow target areas. While we can use this information to identify when an arrow has aligned with the arrow frame with quite good accuracy, we (unfortunately) determine the peak value when the arrow moves away from the target area, which would mean that we would trigger the events too late. Perhaps a different approach would be to ask Max to trigger an event when it crosses a threshold, and use this downturn event to reset the state with a onebang (allowing arrows to be triggered again).
Limiting Input to Songs Only
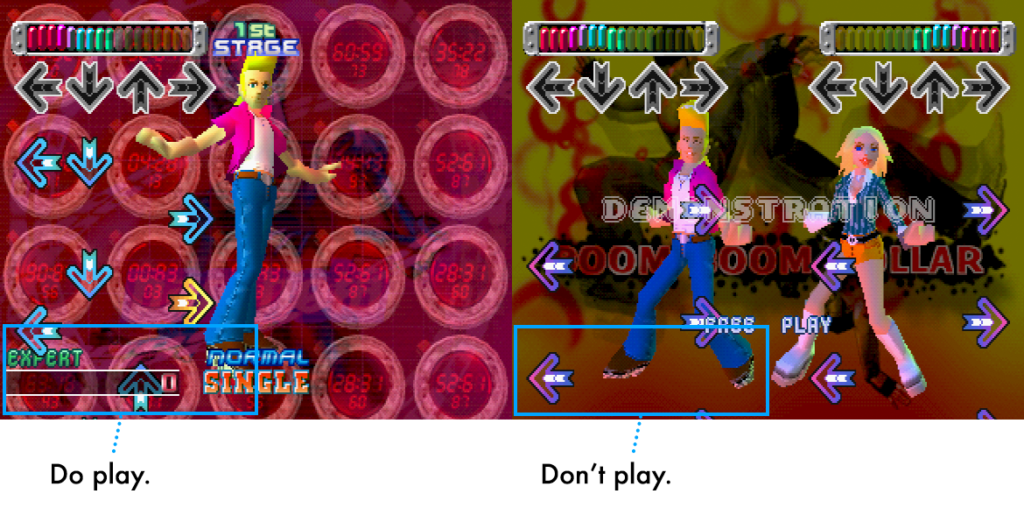
So that I didn’t have to juggle with starting and stopping Max from acting when it shouldn’t, one of the final touches I added was to disable arrow triggers if part of the game screen wasn’t in view. (This is why you might noticed Max go to sleep in between tracks.) Max will watch the score part of the screen to understand when to trigger arrow events. This ensures that arrows are not triggered on Demonstration screens, or other spurious instances of colour in the masked areas.
Future Improvements
The video at the start of this post shows an example of Max playing some of the more difficult tracks in the game:
- “If You Were Here” — Jennifer. [Paramount 🦶🦶🦶🦶🦶🦶🦶]
- “Afronova” — Re-Venge. [Catastrophic 🦶🦶🦶🦶🦶🦶🦶🦶🦶]
- “Dynamie Rave” — Naoki. [Catastrophic 🦶🦶🦶🦶🦶🦶🦶🦶🦶]
As can be seen, there are occasions where the timing of the triggered arrow events is not quite right. The system completes “If You Were Here” and “Dynamite Rave” fairly well, but struggles a bit with “Afronova”. This is mostly due to limitations in my implementation: as I’m purely using the screen to identify the events, the system gets easily fooled by rapid repeats when it can’t discern a drop in colour between frames.
Alternative Approaches
There might be some creative ways to get Max to follow the BPM of the track a little more acutely (and therefore quantize arrow trigger events) by performing some kind of beat detection on the music track. Alternatively, we might be able to determine the BPM of the track by watching the rate at which the target arrows pulse. Instead of just watching the arrows when they enter the frame, maybe it might be more robust to measure the optical flow of the rising arrows and time their triggers with a sub-frame temporal accuracy.
The Patcher
There are a couple of other things going on in the patcher if you want to download and have a snoop around. (Of course, you’ll need to do some setup with OpenEmu and OSCulator.)